Welcome to our comprehensive guide on essential painting tips that all renters should know. Whether you’re looking to freshen up your rental space or add a personal touch, painting can be a fantastic way to transform the look and feel of your home. In this blog post, we will provide you with a wealth of knowledge and practical advice to help you achieve professional-looking results while adhering to the unique considerations that come with being a renter. Let’s dive in!
- Obtain Permission from Your Landlord
Before you embark on any painting project, it is crucial to obtain permission from your landlord. Many rental agreements have specific clauses regarding painting, so it’s important to review your contract or consult with your landlord directly. Seek clarity on any restrictions, guidelines, or color preferences they may have.
- Choose Paint Colors Wisely
When selecting paint colors for your rental, opt for neutral tones that will appeal to a broad range of potential future tenants. Neutral shades like whites, beiges, and grays create a blank canvas that allows for easy customization with furniture and décor. Remember, lighter shades can make a room feel more spacious, while darker tones can add warmth and coziness.
- Test Paint Samples
Before committing to a particular color, it’s wise to test paint samples on your walls. Lighting conditions and the existing color of your walls can significantly impact how a paint color appears. Apply small patches of your chosen colors and observe them throughout the day to ensure you’re happy with the results.
- Prepare the Surface
Proper surface preparation is key to achieving a flawless paint job. Thoroughly clean the walls to remove any dirt, dust, or grease. Fill any holes or cracks with a spackling compound and sand them smooth. Use painter’s tape to protect trim, baseboards, and other areas you don’t want to paint. Taking these steps will ensure a smooth and even application of paint.
- Invest in High-Quality Tools and Supplies
To achieve professional-looking results, it’s worth investing in high-quality painting tools and supplies. Quality brushes, rollers, and paint trays will make your painting process more efficient and help you achieve a smoother finish. Additionally, choose paints that are specifically formulated for your intended surface, whether it’s walls, ceilings, or trim.
- Apply Primer
Applying a coat of primer before painting can make a significant difference in the final result. Primer helps to create an even base, enhances paint adhesion, and can prevent stains or discoloration from bleeding through. Opt for a primer that suits your surface type, such as a stain-blocking primer for covering up water stains or a high-adhesion primer for slick or glossy surfaces.
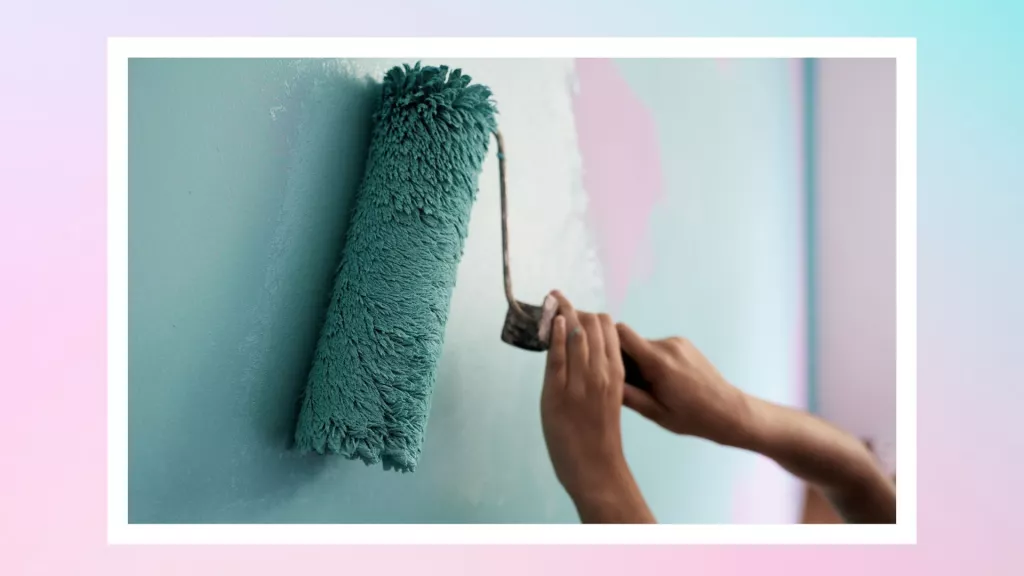
- Follow Proper Painting Techniques
To achieve professional-looking results, follow these essential painting techniques:
a. Cut in before rolling: Use a high-quality angled brush to paint the edges and corners of the walls before using a roller. This technique ensures crisp lines and eliminates the need for touch-ups.
b. Use the W technique: When rolling paint onto the walls, use the “W” technique. Start by rolling a W shape on the wall, then fill it in without lifting the roller. This method ensures even coverage and minimizes streaks.
c. Feather edges: When rolling, overlap each stroke slightly with the previous one to create a seamless finish. Feathering the edges of each stroke will prevent visible lines or roller marks.
- Allow Proper Drying Time
Patience is key when it comes to painting. Allow sufficient drying time between coats as specified on the paint can to ensure the best results. Rushing the drying process can lead to smudges, uneven coverage, and ultimately, a less professional-looking finish. Follow the manufacturer’s instructions for drying times, which can vary depending on the type of paint and environmental conditions.
- Apply Multiple Thin Coats
Instead of applying one thick coat of paint, it’s generally better to apply multiple thin coats. This approach allows for better adhesion, smoother coverage, and a more durable finish. Start with a thin base coat and gradually build up the color with additional coats as needed. Remember to allow sufficient drying time between each coat.
- Pay Attention to Ventilation
Proper ventilation is crucial when painting indoors. Open windows and doors to ensure fresh air circulation, especially if you’re working with oil-based paints or using chemical cleaners for surface preparation. Adequate ventilation helps to minimize odors, speeds up the drying process, and improves overall air quality in your living space.
- Protect Floors and Furniture
Before you start painting, take the necessary steps to protect your floors and furniture. Lay down drop cloths or plastic sheets to prevent paint splatters and spills. Remove or cover furniture with plastic wrap or old sheets to safeguard them from accidental drips. Remember, prevention is key to avoiding unnecessary damage or clean-up later on.
- Clean Up Properly
Once you’ve completed your painting project, it’s important to clean up properly. Wash brushes, rollers, and paint trays with soap and water immediately after use. Remove painter’s tape gently to avoid peeling off any fresh paint. Proper clean-up not only extends the life of your painting tools but also ensures a tidy and organized living environment.
- Document Your Changes
Before you start painting, it’s a good idea to document the existing condition of the walls and any changes you make. Take clear photographs of the walls, noting any existing imperfections or damage. This documentation can serve as evidence of the condition of the rental unit before you moved in and can help prevent disputes with your landlord regarding any painting-related issues.
- Seek Professional Help When Needed
While painting can be a fun and rewarding DIY project, there may be instances where professional assistance is warranted. If you’re unsure about your painting skills or need to tackle more complex tasks like wallpaper removal or intricate trim work, consider hiring a professional painter. They have the expertise and experience to handle challenging projects efficiently and can ensure high-quality results.
By following these essential painting tips for renters, you can achieve remarkable results while respecting your rental agreement and maintaining a harmonious relationship with your landlord. Remember to obtain permission, choose colors wisely, prepare the surface thoroughly, invest in quality tools, and follow proper painting techniques. With patience, attention to detail, and a bit of creativity, you can transform your rental space into a personalized oasis. Happy painting!
1. Understand Your Rental Agreement
Before embarking on any painting project, it’s crucial to thoroughly review your rental agreement. Some landlords have specific rules and restrictions regarding painting, including color choices, finishes, and procedures. Ensure you comply with these guidelines to avoid any potential conflicts and maintain a positive relationship with your landlord.
2. Choose the Right Colors and Finishes
Selecting the appropriate colors and finishes for your rental space is a fundamental step in achieving a desired look and feel. Opt for lighter shades to create an illusion of spaciousness in smaller rooms, or experiment with bold colors to add character and personality. Additionally, consider using washable and durable paint finishes, such as satin or eggshell, to facilitate easy cleaning and maintenance.
3. Prepare the Space
Proper preparation is key to achieving a flawless paint job. Here’s a step-by-step guide to preparing your rental space:
Step 1: Clear the Area
Remove furniture, fixtures, and any other items that could obstruct your painting process. This will provide you with ample space to work efficiently and protect your belongings from accidental splatters.
Step 2: Clean and Repair
Thoroughly clean the walls to remove dust, dirt, and any existing residue. Repair any imperfections, such as cracks or holes, using a spackling compound or filler. Sand the patched areas lightly to create a smooth surface.
Step 3: Protect Surfaces
Cover floors, furniture, and any other surfaces you want to keep paint-free with drop cloths, plastic sheets, or painter’s tape. This precautionary measure will prevent accidental spills or splatters, saving you time and effort on cleanup.
4. Gather Quality Tools and Materials
To achieve professional-looking results, it’s essential to invest in high-quality tools and materials. Here’s a list of items you’ll need:
- Paint rollers and brushes: Choose rollers with the appropriate nap length for your walls and brushes that suit your desired finish.
- Paint trays and liners: These will make the application process smoother and more efficient.
- Painter’s tape: Use it to create crisp, clean edges and protect adjacent surfaces.
- Paint: Select a premium-quality paint that suits your desired color and finish.
5. Follow a Methodical Painting Process
Adopting a systematic approach to painting will help you achieve consistent and flawless results. Here’s a recommended method:
Step 1: Prime the Walls
If your walls have stains, discoloration, or are significantly different in color from your desired shade, applying a primer is essential. Priming helps ensure better adhesion, coverage, and a uniform finish.
Step 2: Cut in the Edges
Using a high-quality angled brush, cut in along the edges, corners, and ceiling. This technique creates clean lines and avoids paint overlap onto adjacent surfaces.
Step 3: Roll on the Paint
Fill a paint tray with your chosen paint and load the roller evenly. Start from the top corner of the wall and work your way down in vertical sections. Apply gentle pressure and maintain a consistent rhythm to achieve an even and smooth coat.
Step 4: Apply Additional Coats
Once the initial coat is dry, assess the coverage and determine if additional coats are needed. Applying multiple thin coats is generally better than a single thick coat, as it helps to achieve a more uniform and professional finish. Allow sufficient drying time between each coat as per the manufacturer’s instructions.
Step 5: Remove Painter’s Tape
Carefully remove the painter’s tape while the paint is still slightly wet. This prevents the tape from sticking to the wall and causing any unintended damage. Pull the tape at a 45-degree angle to ensure clean and crisp lines.
6. Take Care of Clean-Up
After completing your painting project, it’s crucial to clean up properly to maintain the integrity of your rental space. Follow these steps:
- Clean your brushes and rollers with soap and water or the appropriate cleaning agent for the type of paint used.
- Dispose of any leftover paint or containers responsibly, following local regulations.
- Remove drop cloths and plastic sheets, ensuring no paint residue is left behind.
- Return furniture and belongings to their original positions, taking care not to damage freshly painted surfaces.